
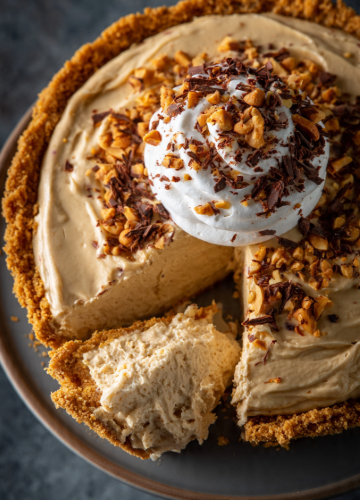
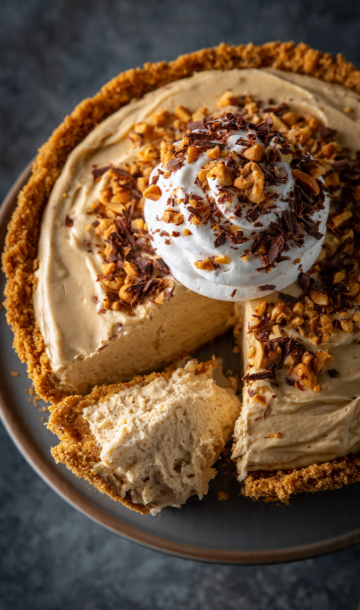
No-Bake Peanut Butter Pie: A Creamy Dream Come True
Imagine a dessert so rich, so creamy, and so effortlessly delicious that it requires no oven time, no complicated techniques, and just a handful of simple ingredients. This
Ingredients
- For the Classic Graham Cracker Crust :
- ½ cups graham cracker crumbs (about 10-12 full crackers)
- ¼ cup granulated sugar
- tablespoons (85g) unsalted butter, melted
- For the Creamy Filling :
- oz (226g) cream cheese, softened to room temperature
- cup creamy peanut butter (not natural or oily)
- ¾ cup to 1 cup confectioners' sugar
- teaspoon vanilla extract
- oz (about 1 ½ cups) whipped topping (like Cool Whip), thawed
- Optional Toppings :
- Chopped Reese's Peanut Butter Cups
- Crushed peanuts
- Chocolate shavings or chocolate syrup
- Extra whipped topping
- Step-by-Step Instructions
- Part 1: Prepare the Crust
- In a medium bowl, mix the graham cracker crumbs and sugar.
- Pour the melted butter over the crumbs and stir until the mixture is evenly moistened and resembles wet sand.
- Press the crumb mixture firmly into the bottom and up the sides of a 9-inch pie dish. Use the back of a spoon or a flat-bottomed glass to pack it tightly.
Imagine a dessert so rich, so creamy, and so effortlessly delicious that it requires no oven time, no complicated techniques, and just a handful of simple ingredients. This is the magic of the No-Bake Peanut Butter Pie. It’s a timeless classic that combines the nostalgic flavor of creamy peanut butter with a light, fluffy texture, all nestled in a buttery graham cracker or chocolate cookie crust . Whether you’re a seasoned baker or a beginner looking for a foolproof treat, this pie is a creamy dream come true.
Table of Contents
Why You’ll Love This No-Bake Peanut Butter Pie
There are countless reasons to fall in love with this dessert, but here are a few that stand out:
- Effortless Preparation: This pie comes together in just 10 to 15 minutes of active prep time, with no baking required . It’s the perfect solution for hot summer days or when you simply don’t want to heat up your kitchen.
- Incredibly Creamy Texture: The combination of cream cheese, peanut butter, and whipped topping creates a filling that is rich yet airy . It’s a decadent treat that melts in your mouth.
- Make-Ahead Marvel: This pie needs to chill for several hours, making it the ultimate make-ahead dessert for holidays, potlucks, or busy weekdays . The flavor and texture actually improve as it sets.
- Customizable Canvas: From the crust to the toppings, this recipe is incredibly versatile . You can easily adapt it to suit your taste or whatever you have on hand.
Recipe Overview
- Prep Time: 15 minutes
- Chill Time: 4 hours (minimum) or overnight
- Total Time: Approximately 4 hours 15 minutes
- Servings: 8 slices
- Dietary Info: Vegetarian
- Skill Level: Beginner
The Foundation: Your Choice of Crust
The crust is the base of any great pie, and this no-bake version offers delicious flexibility. A classic choice is a pre-made graham cracker crust for its sweet, honey-like flavor . However, for a more decadent twist, many prefer a chocolate cookie crust, like an Oreo crust . You can easily make your own by pulverizing cookies and mixing with melted butter, or purchase a ready-made one for ultimate convenience .
The Star of the Show: The Creamy Filling
The filling is where this pie truly shines. It typically consists of just a few key ingredients:
- Cream Cheese: Provides a rich, creamy base .
- Creamy Peanut Butter: Use a smooth, commercial peanut butter for the best texture .
- Confectioners’ Sugar: Sweetens the filling and helps achieve a smooth consistency .
- Whipped Topping (or Whipped Cream): This is folded in gently to create a light and fluffy texture .
The process is simple: beat the cream cheese and peanut butter together until smooth, add the sugar, then gently fold in the whipped topping to maintain its airy volume .
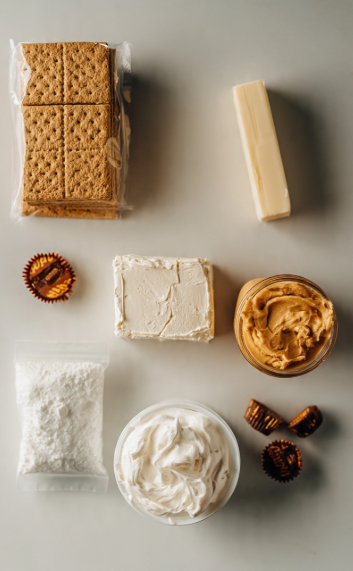
Ingredients
For the Classic Graham Cracker Crust :
- 1 ½ cups graham cracker crumbs (about 10-12 full crackers)
- ¼ cup granulated sugar
- 6 tablespoons (85g) unsalted butter, melted
For the Creamy Filling :
- 8 oz (226g) cream cheese, softened to room temperature
- 1 cup creamy peanut butter (not natural or oily)
- ¾ cup to 1 cup confectioners’ sugar
- 1 teaspoon vanilla extract
- 8 oz (about 1 ½ cups) whipped topping (like Cool Whip), thawed
Optional Toppings :
- Chopped Reese’s Peanut Butter Cups
- Crushed peanuts
- Chocolate shavings or chocolate syrup
- Extra whipped topping
Step-by-Step Instructions
Part 1: Prepare the Crust
1. In a medium bowl, mix the graham cracker crumbs and sugar.
2. Pour the melted butter over the crumbs and stir until the mixture is evenly moistened and resembles wet sand.
3. Press the crumb mixture firmly into the bottom and up the sides of a 9-inch pie dish. Use the back of a spoon or a flat-bottomed glass to pack it tightly.
4. Place the crust in the refrigerator to chill for at least 30 minutes while you make the filling .
Part 2: Make the Creamy Filling
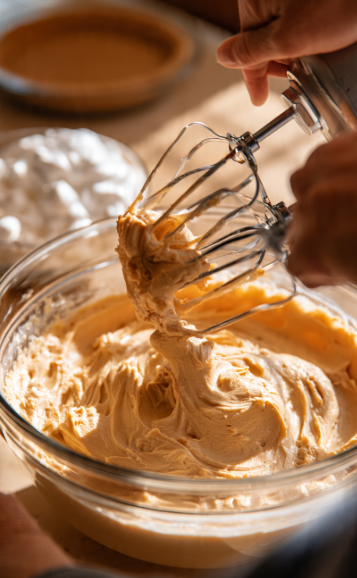
1. In a large mixing bowl, beat the softened cream cheese and peanut butter with an electric mixer until the mixture is smooth, creamy, and completely combined.
2. Add the confectioners’ sugar and vanilla extract, and continue beating until fully incorporated and no lumps remain.
3. Gently fold the whipped topping into the peanut butter mixture using a rubber spatula. Mix until the filling is light, fluffy, and uniform in color. Be careful not to overmix, as this can deflate the air and make the pie dense .
Part 3: Assemble and Chill
1. Pour the filling into your chilled crust, spreading it evenly with a spatula .
2. Garnish with your chosen toppings, such as chopped peanut butter cups and crushed peanuts .
3. Refrigerate the pie for at least 4 hours, or ideally overnight, to allow it to set properly . A longer chill time gives the filling a firmer, more sliceable texture .
Part 4: Serve and Enjoy
1. Once the pie is fully set and firm to the touch, slice and serve it cold.
2. For clean slices, use a large, sharp knife and wipe it clean between cuts . For the cleanest cuts, you can also freeze the pie for 30 minutes before slicing .
5 Essential Tips for the Best No-Bake Peanut Butter Pie
- Soften the Cream Cheese: This is crucial for a smooth, lump-free filling. Take the cream cheese out of the fridge at least an hour before you start .
- Warm the Peanut Butter: For an even smoother filling, warm your peanut butter in the microwave for about 30 seconds before adding it to the bowl .
- Fold, Don’t Mix: When adding the whipped topping, use a gentle folding motion. This preserves the air, which is the key to a light and fluffy texture .
- Use High-Quality Ingredients: Since this dessert has so few ingredients, their quality truly shines. Use a smooth peanut butter you enjoy eating .
- Patience is Key: Don’t rush the chilling process. Allowing the pie to set for the full 4 hours or overnight gives it a perfect, sliceable texture and allows the flavors to meld beautifully .
Frequently Asked Questions (FAQ)
Q: Can I use natural peanut butter?
A: While you can, it is recommended to use a commercial creamy peanut butter for the best texture. Natural peanut butter can be oily and may separate, leading to a slightly different consistency .
Q: How long will this pie last in the fridge?
A: This pie can be stored covered in the refrigerator for up to 3-4 days .
Q: Can I freeze this pie?
A: Yes! You can freeze this pie for up to 2-3 months. Make sure to wrap it tightly in plastic wrap and then foil. Thaw it in the refrigerator overnight before serving .
Q: Can I use a different crust?
A: Absolutely. While a graham cracker crust is traditional, an Oreo or chocolate cookie crust adds a wonderful richness . You can also use a homemade crust .
Conclusion: A Slice of Pure Bliss
This No-Bake Peanut Butter Pie is the epitome of a simple, delicious dessert . It’s a recipe that proves you don’t need an oven or a long list of ingredients to create something truly spectacular. The rich, creamy, peanut-buttery filling, nestled in a buttery crust and topped with your favorite goodies, is guaranteed to become a new family favorite. It’s the perfect treat for any occasion, from a casual gathering to a festive holiday table. So, gather your ingredients, and get ready to enjoy a creamy dream come true.
Have you tried making this No-Bake Peanut Butter Pie? Share your photos, your favorite crust choices, and any creative toppings you’ve added in the comments below!