
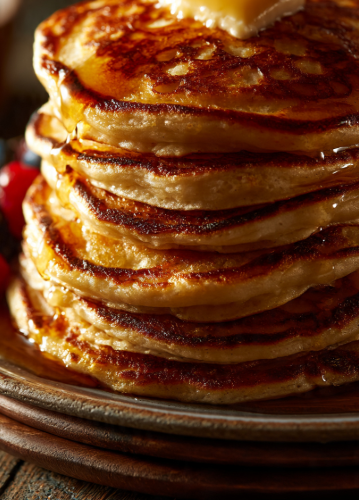
There is a great divide in the pancake-loving community. On one side, you have those who cherish a uniform, pillowy-soft stack. On the other, you have those who know the true magic lies in the edges—those gloriously golden, slightly caramelized, and blissfully crunchy borders that transform a simple breakfast into an unforgettable experience . If you are in the latter camp, this guide is your new bible.
These pancakes are the ultimate breakfast revelation. They strike a perfect balance between a light, fluffy interior and a crisp, buttery exterior. The secret to achieving that coveted texture is a combination of the right batter, the perfect pan, and a cooking technique that encourages the batter to fry into a golden, crunchy halo. This guide will arm you with all the techniques, tips, and recipes you need to achieve crispy-edged perfection every single time.
The Ultimate Guide to Perfect Crispy-Edged Pancakes: A Breakfast Revelation
There is a great divide in the pancake-loving community. On one side, you have those who cherish a uniform, pillowy-soft stack. On the other, you have those who
Table of Contents
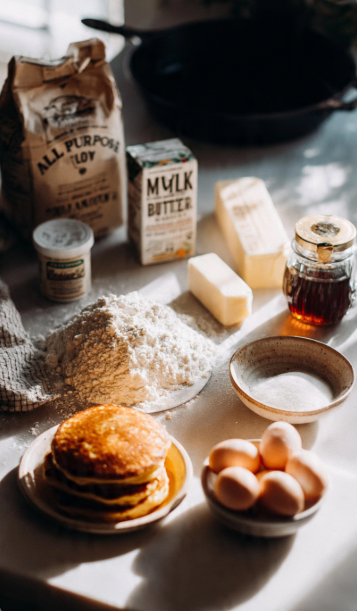
The Foundation: The Perfect Batter for Crispy Edges
The journey to a crispy-edged pancake starts with the batter itself. While a standard pancake mix can work, controlling the ingredients gives you the best results.
Classic Buttermilk Recipe for Crispy Edges
This version delivers a tangy flavor and a tender texture that fries up beautifully.
- Dry Ingredients: Whisk together 1 ½ cups all-purpose flour, 2 tablespoons sugar, 1 teaspoon baking powder, ½ teaspoon baking soda, and ½ teaspoon salt.
- Wet Ingredients: In a separate bowl, combine 1 ¼ cups buttermilk, 2 large eggs, 2 tablespoons melted unsalted butter, and 1 teaspoon vanilla extract.
- Combine: Gently fold the wet ingredients into the dry. A few lumps are okay. The key is not to overmix, as overworking the gluten will make your pancakes dense and chewy, robbing them of that desired fluffy center.
The Pro’s Choice: A Custardy, Crispy Pancake
Inspired by legendary pancakes, this version uses clarified butter (ghee) for a higher smoke point, allowing you to fry the pancakes until the edges are almost burnt and the center is impossibly light.
- Base: Whisk 2 egg yolks with 28g sugar until pale and fluffy. Add 140g sifted flour, 25g baking powder, 3g salt, and the zest of one lemon.
- Build the Batter: Gently fold in 150g whole milk and 100g buttermilk alternately with the flour mixture. Stir in 30g melted clarified butter.
- Whip and Fold: Whip 1 egg white to soft peaks and gently fold it into the batter to give it that impossibly light texture.
The “Lace” Technique (The Viral O-Shape)
Here is a modern hack for those who believe you can never have too much crunch. This viral TikTok trick involves drizzling your batter into the pan in a donut or “O” shape.
- The Result: By creating a hole in the center, you effectively create two edges on your pancake, maximizing the amount of crunchy surface area.
- Extra Function: This technique also creates a perfect well for holding syrup, fruit, or whipped cream.
Enhancing the Batter for Extra Crunch
- Cornmeal Addition: For an extra layer of texture, replace ½ cup of the all-purpose flour with ½ cup of cornmeal. This adds a delightful crunch to the edges.
- Melted Butter vs. Oil: Using melted butter in the batter adds flavor, but using oil can create a slightly crispier texture . For the ultimate crispy edge, some recipes recommend using both.
The Equipment: Which Pan is Best for the Job?
The pan you choose is nearly as important as the batter itself. While non-stick skillets are convenient, the consensus for the best crispy edges is a heavy, heat-retaining pan.
The Cast Iron Classic
A well-seasoned cast iron skillet is the undisputed champion of crispy-edged pancakes. Its ability to hold and distribute heat evenly creates the perfect environment for frying the batter’s edges to a caramelized crisp.
- How it Works: The weight and heat retention of cast iron allow you to use a more generous amount of fat, which effectively shallow-fries the sides of the pancake.
- Alternatives: A heavy stainless steel or carbon steel pan also works well. Avoid thin, lightweight pans that create hot spots and uneven cooking.
The Cooking Process: Mastering the Technique
The final piece of the puzzle is the technique. Follow these steps for a consistent, crispy, and fluffy stack.
Step 1: Control Your Heat
Preheat your pan over medium heat. A pan that’s too hot will burn the outside before the inside cooks, while a pan that’s too low will produce dry, steaming pancakes. The ideal temperature is around 350°F to 375°F.
Step 2: The Fat is Key
To get that signature fried, crispy edge, don’t be shy with the fat. A combination of vegetable oil (which prevents burning) and butter (which adds flavor and helps with browning) is ideal. You want enough fat in the pan to come up the sides of the pancake slightly, frying the edges in the bubbling butter.
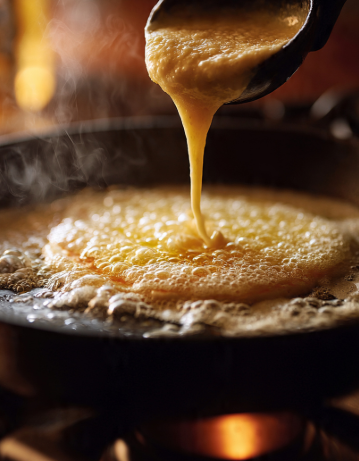
Step 3: Cook Like a Pro
- Pour: Ladle about ¼ cup of batter onto the hot, buttered surface.
- Wait: Do not flip prematurely. Wait until bubbles form on the surface and the edges look set, dry, and golden brown. This can take about 2-3 minutes.
- Flip: Carefully flip and cook for another 45-60 seconds, or until the second side is golden brown.
- Rest: Keep the finished pancakes warm on a baking sheet in a 200°F oven to prevent them from becoming soggy.
5 Expert Tips for Crispy Perfection Every Time
- Don’t Overmix: Overmixing develops gluten, leading to tough pancakes. Mix just until the dry ingredients are moistened—a few lumps are perfectly fine.
- Add an Extra Egg: For a custardy interior and crispier exterior, add an extra egg yolk to the batter.
- Wipe the Pan: Wipe the skillet clean between batches to remove burnt butter solids, which can darken and impart a bitter flavor.
- Use Clarified Butter: Ghee or clarified butter has a higher smoke point than regular butter, allowing you to get a better sear without burning.
- Let the Batter Rest: Letting the batter rest for 10-15 minutes allows the gluten to relax and the baking powder to activate, resulting in lighter, fluffier pancakes.
Frequently Asked Questions (FAQ)
Q: Why aren’t my pancakes getting crispy?
A: The most common reasons are not using enough fat in the pan, not having the pan hot enough, or using a pan that doesn’t retain heat well. Try adding more butter or oil and preheating your cast-iron skillet thoroughly.
Q: Can I use a non-stick pan for crispy pancakes?
A: Yes, but non-stick pans don’t retain heat as well as cast iron. They can work, but you may need to be more careful about heat control and use a bit more fat.
Q: How do I keep pancakes crispy after cooking?
A: Place cooked pancakes on a wire rack in a warm oven (200°F) rather than stacking them on a plate. Stacking traps steam and makes them soggy. The wire rack allows air to circulate, keeping both sides crisp.
Q: Can I make the batter ahead of time?
A: Yes, you can make the batter up to 24 hours in advance and store it in the refrigerator. Let it come to room temperature and give it a gentle stir before cooking.
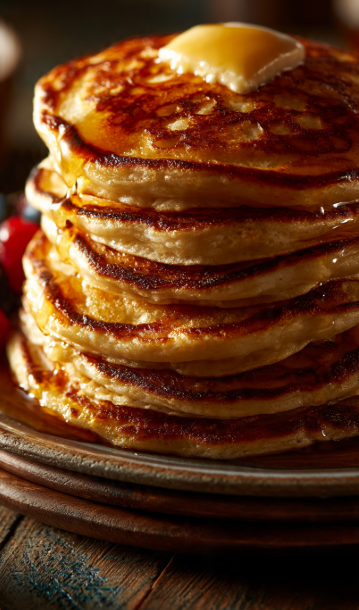
Q: What’s the best topping for crispy-edged pancakes?
A: The classic is salted butter and maple syrup. The salt balances the sweetness and complements the caramelized edges beautifully. Fresh berries, whipped cream, or a dollop of yogurt also work wonderfully.
Conclusion: The Ultimate Breakfast Revelation
Achieving the perfect crispy-edged pancake at home isn’t about complex techniques or rare ingredients. It’s about understanding the science behind the crisp using the right pan, the right fat, and the right timing. Whether you choose a classic buttermilk recipe, the custardy Chez Ma Tante style, or even try the viral “O” shape trick, you can now transform your morning routine into a delightful, crunchy revelation. Stack them high, serve them hot, and enjoy the best of both worlds: a fluffy, tender center with the most gloriously crisp, buttery edges.
Have you tried making crispy-edged pancakes at home? Share your favorite tips and variations in the comments below. Happy flipping!