
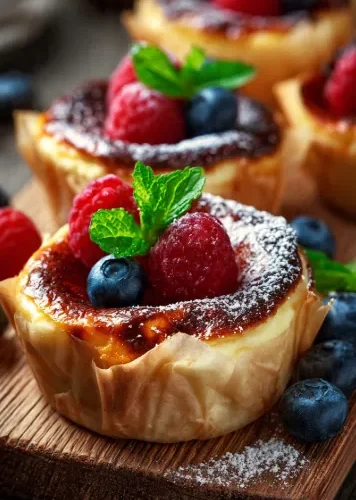
Mini Basque Burnt Cheesecake
If you’ve ever admired the deeply caramelized top and irresistibly creamy center of a Basque burnt cheesecake, you’ll love this miniature version. Mini Basque Burnt Cheesecakes deliver everything that makes the original famous but in perfectly portioned individual servings that are easy to bake, elegant to serve, and even easier to enjoy.
Originating in Spain’s Basque region, this iconic dessert breaks many traditional cheesecake rules. Instead of striving for a pale, perfectly smooth top, the cheesecake is intentionally baked at a high temperature until the surface develops a rich, almost toasted appearance. Beneath that beautifully dark exterior lies an incredibly silky, custard-like filling that melts in your mouth with every bite.
These mini cheesecakes offer several advantages over a full-sized version. They bake more quickly, cool faster, require no water bath, and are ideal for entertaining because each guest receives their own individual dessert. They’re also an excellent choice for holidays, birthdays, dinner parties, afternoon coffee, or whenever you’re craving something luxurious without spending hours in the kitchen.
The recipe itself is wonderfully approachable. A handful of simple ingredients cream cheese, sugar, eggs, heavy cream, and vanilla come together to create a dessert that feels sophisticated while remaining beginner-friendly. Even first-time cheesecake bakers can achieve impressive results by following a few straightforward techniques.
Whether you serve them plain, dusted with powdered sugar, or topped with fresh berries, these Mini Basque Burnt Cheesecakes are guaranteed to become a favorite in your dessert collection.
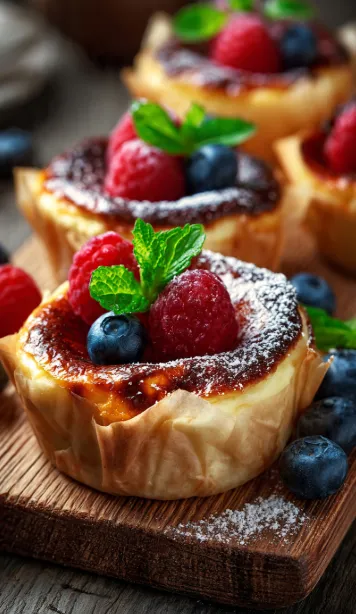
Mini Basque Burnt Cheesecake | Easy Individual Recipe
Mini Basque Burnt Cheesecake If you’ve ever admired the deeply caramelized top and irresistibly creamy center of a Basque burnt cheesecake, you’ll love this miniature version. Mini
Table of Contents
Recipe Overview
| Detail | Information |
|---|---|
| Prep Time | 20 minutes |
| Cook Time | 22–28 minutes |
| Total Time | 50 minutes (plus chilling time) |
| Servings | 6 mini cheesecakes |
| Cuisine | Spanish |
| Course | Dessert |
| Calories | Approximately 410 per cheesecake |
Why You’ll Love This Recipe
These individual cheesecakes combine impressive presentation with surprisingly simple preparation.
Reasons to love this recipe include:
- No water bath required
- Rich, creamy texture
- Signature caramelized top
- Individual servings
- Beginner-friendly
- Elegant enough for entertaining
- Simple pantry ingredients
- Faster than a full cheesecake
- Freezer-friendly
- Endless topping possibilities
Every cheesecake develops its own beautifully rustic appearance, making each one unique.
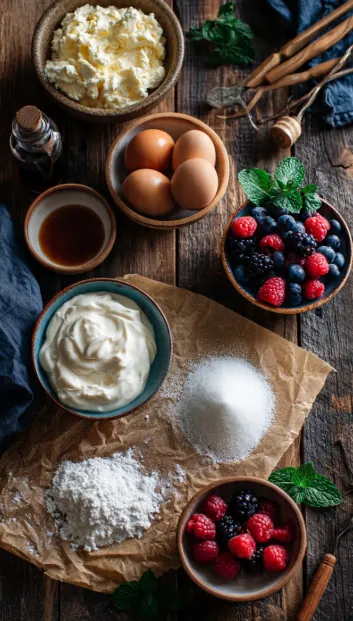
Ingredients
Cheesecake Batter
- 16 ounces (454 g) full-fat cream cheese, softened
- ¾ cup (150 g) granulated sugar
- 2 large eggs, room temperature
- ¾ cup (180 ml) heavy cream
- 1 teaspoon vanilla extract
- ¼ teaspoon fine sea salt
- 1 tablespoon all-purpose flour
Optional Garnishes
- Fresh raspberries
- Fresh blueberries
- Powdered sugar
- Lemon zest
- Fresh mint leaves
- Salted caramel sauce
- Berry compote
Ingredient Notes
Cream Cheese
Use full-fat cream cheese for the signature creamy texture. Reduced-fat versions may produce a thinner filling.
Heavy Cream
Heavy cream contributes richness and helps create the cheesecake’s custard-like center.
Eggs
Room-temperature eggs blend more evenly into the batter and reduce the risk of overmixing.
Flour
A small amount of flour provides just enough structure while preserving the cheesecake’s creamy interior.
Vanilla Extract
Pure vanilla extract complements the caramelized flavor without overpowering it.
Step-by-Step Instructions
1. Prepare the Oven
Preheat your oven to 425°F (220°C).
Line six large muffin cups or ramekins with parchment paper, allowing the paper to extend above the rim. The parchment creates the cheesecake’s signature rustic appearance.
2. Beat the Cream Cheese
Place the softened cream cheese into a large mixing bowl.
Beat until completely smooth with no lumps remaining.
Take your time during this step, as a smooth base creates the best texture.
3. Add the Sugar
Gradually mix in the sugar until fully incorporated.
Scrape down the sides of the bowl as needed.
4. Incorporate the Eggs
Add the eggs one at a time.
Mix on low speed after each addition just until combined.
Avoid incorporating too much air into the batter.
5. Add Remaining Ingredients
Mix in:
- Heavy cream
- Vanilla extract
- Salt
Finally, sift in the flour.
Blend until the batter becomes silky smooth.
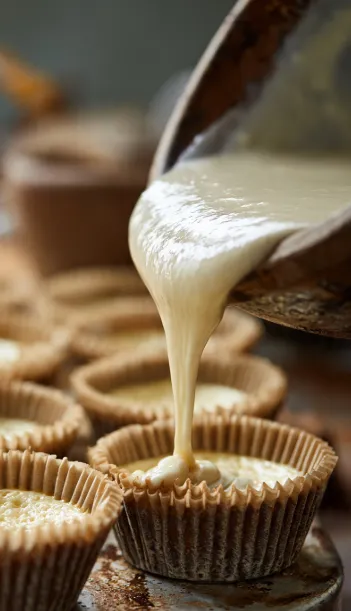
6. Fill the Molds
Divide the batter evenly among the prepared molds.
Fill each about 85–90% full.
The cheesecakes will rise during baking before settling as they cool.
7. Bake
Bake for 22–28 minutes.
The tops should become deeply caramelized while the centers remain slightly jiggly.
This gentle wobble indicates a creamy interior.
8. Cool
Allow the cheesecakes to cool completely at room temperature.
They will naturally settle as they cool.
Transfer them to the refrigerator for at least 4 hours, preferably overnight.
9. Garnish and Serve
Carefully peel away the parchment paper.
Serve plain or garnish with:
- Fresh berries
- Powdered sugar
- Lemon zest
- Salted caramel
- Berry sauce
Expert Tips
Use Room-Temperature Ingredients
Softened ingredients combine more easily and create a smoother batter.
Don’t Fear the Dark Top
The signature caramelized surface is exactly what gives Basque cheesecake its unique flavor.
Avoid Overmixing
Excess air can cause unnecessary cracking.
Chill Thoroughly
The texture improves significantly after several hours in the refrigerator.
Bake at High Heat
The elevated oven temperature creates the iconic contrast between the dark exterior and creamy center.
Variations
Chocolate Mini Basque Cheesecakes
Add ¼ cup melted dark chocolate to the batter.
Lemon Cheesecake
Mix in one tablespoon of fresh lemon zest.
Espresso Version
Add one teaspoon of espresso powder for subtle coffee notes.
Salted Caramel
Serve with homemade salted caramel sauce.
Berry Swirl
Gently swirl raspberry or blueberry preserves into the batter before baking.
Storage Instructions
Store cheesecakes in an airtight container.
- Refrigerator: Up to 5 days
- Freezer: Up to 2 months
Thaw overnight in the refrigerator before serving.
Reheating Tips
These cheesecakes are traditionally served chilled or at cool room temperature.
If preferred:
- Let them sit at room temperature for 20–30 minutes before serving.
Avoid microwaving, which can affect the creamy texture.
Common Mistakes to Avoid
- Using cold cream cheese.
- Overmixing the batter.
- Underbaking the caramelized top.
- Skipping the chilling time.
- Filling the molds too full.
- Removing the parchment while warm.
What to Serve With
These mini cheesecakes pair beautifully with:
- Fresh berries
- Raspberry sauce
- Strawberry compote
- Salted caramel
- Chocolate ganache
- Espresso
- Cappuccino
- Fresh whipped cream
- Sparkling wine
- Earl Grey tea
Frequently Asked Questions
Why is it called a burnt cheesecake?
The cheesecake is intentionally baked at a high temperature so the surface becomes deeply caramelized while the interior stays creamy.
Can I make these ahead of time?
Yes. They’re actually better after chilling overnight, making them perfect for entertaining.
Why is the center still jiggly?
A slight wobble is expected. The cheesecakes continue setting as they cool.
Can I use cupcake liners instead of parchment?
Parchment paper works best because it creates the rustic appearance and releases more easily.
Can I freeze Mini Basque Burnt Cheesecakes?
Absolutely. Wrap each cheesecake individually before freezing for up to two months.
Do I need a water bath?
No. One of the defining features of Basque cheesecake is that it bakes without one.
Can I flavor the batter?
Yes. Citrus zest, espresso powder, chocolate, or fruit preserves are all delicious additions.
Why did my cheesecakes crack?
Minor cracks are completely normal and contribute to the rustic charm of Basque cheesecake.
Conclusion
These Mini Basque Burnt Cheesecakes prove that impressive desserts don’t have to be complicated. Their deeply caramelized tops, velvety centers, and rustic appearance create an elegant dessert that’s surprisingly simple to master.
Whether you’re baking for a dinner party, celebrating a special occasion, or simply treating yourself to something extraordinary, these individual cheesecakes deliver rich flavor and unforgettable texture with minimal effort. Enjoy them plain to appreciate their classic character, or personalize each serving with fresh fruit, caramel, or your favorite seasonal toppings.
Once you’ve experienced the contrast between the lightly caramelized exterior and the luxuriously creamy center, it’s easy to see why Basque burnt cheesecake has become a beloved dessert around the world. Save this recipe, bake a batch, and don’t forget to share your creations with family and friends—they’re sure to disappear quickly.