
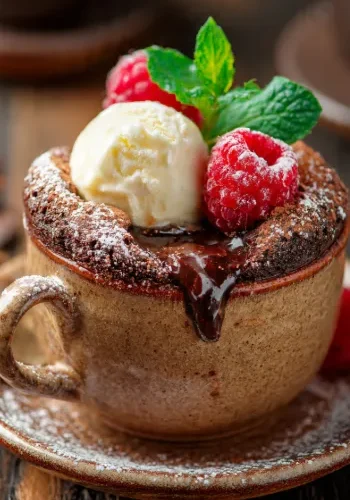
Chocolate Lava Mug Cake
Some dessert cravings simply refuse to wait. When you want something warm, rich, and deeply chocolatey without turning on the oven or making an entire cake, this Chocolate Lava Mug Cake is exactly the recipe you need. It comes together in one mug, cooks in just a couple of minutes, and rewards you with a soft, fluffy chocolate cake hiding an irresistibly molten center.
What makes this recipe especially satisfying is how effortlessly it transforms everyday pantry ingredients into a dessert that feels worthy of a restaurant menu. With a quick stir and a short trip to the microwave, you’ll have a decadent chocolate treat that’s perfect for cozy evenings, movie nights, last-minute guests, or whenever your sweet tooth calls.
Unlike traditional lava cakes that require precise baking times and individual ramekins, this mug cake is wonderfully forgiving. Even beginner bakers can achieve a soft, gooey center by following a few simple tips. The rich cocoa flavor pairs beautifully with melted chocolate tucked inside the batter, creating a luxurious texture that’s somewhere between a brownie and a soufflé.
Whether you enjoy it straight from the mug with a spoon or dress it up with ice cream, whipped cream, or fresh berries, this Chocolate Lava Mug Cake proves that an unforgettable dessert doesn’t have to take hours to prepare.
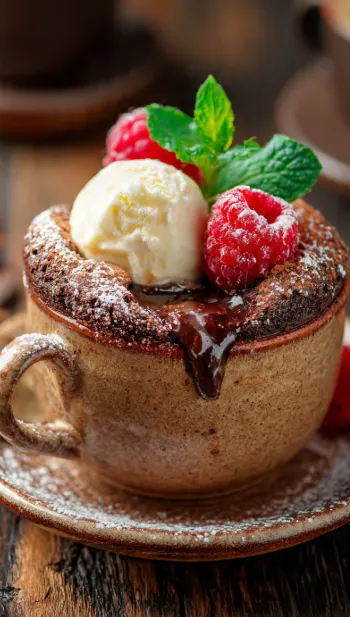
Chocolate Lava Mug Cake | Easy 5-Minute Dessert
Chocolate Lava Mug Cake Some dessert cravings simply refuse to wait. When you want something warm, rich, and deeply chocolatey without turning on the oven or making an
Table of Contents
Recipe Overview
| Detail | Information |
|---|---|
| Prep Time | 5 minutes |
| Cook Time | 1½–2 minutes |
| Total Time | 7 minutes |
| Servings | 1 large mug cake |
| Cuisine | American |
| Course | Dessert |
| Calories | Approximately 520 |
Why You’ll Love This Recipe
This Chocolate Lava Mug Cake has become a favorite because it combines convenience with incredible flavor.
Here are just a few reasons to make it:
- Ready in minutes
- One mug means easy cleanup
- Rich chocolate flavor
- Gooey molten center
- Beginner-friendly
- No oven required
- Made with pantry staples
- Perfect single serving
- Easy to customize
- Great for late-night cravings
It’s the kind of recipe you’ll memorize after making it once.
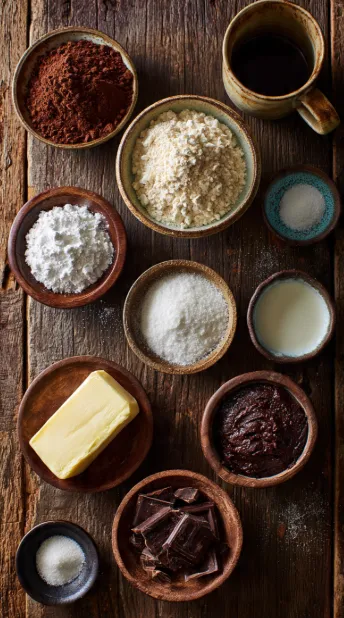
Ingredients
Mug Cake Batter
- 4 tablespoons all-purpose flour
- 2 tablespoons unsweetened cocoa powder
- 2 tablespoons granulated sugar
- ¼ teaspoon baking powder
- Pinch of fine salt
- 3 tablespoons whole milk
- 2 tablespoons vegetable oil or melted butter
- ½ teaspoon vanilla extract
Lava Center
- 1 square (about 20 g) dark chocolate
- or 1 tablespoon chocolate hazelnut spread
Optional Toppings
- Vanilla ice cream
- Whipped cream
- Powdered sugar
- Chocolate sauce
- Fresh strawberries
- Fresh raspberries
- Chocolate shavings
- Chopped toasted hazelnuts
Ingredient Notes
Cocoa Powder
Choose a high-quality unsweetened cocoa powder for a rich, deep chocolate flavor. Dutch-process cocoa creates an even darker cake.
Chocolate Center
A square of dark chocolate melts beautifully into a molten center. Chocolate hazelnut spread also works well for an extra creamy filling.
Oil vs. Butter
Vegetable oil creates a softer, moister cake, while melted butter adds a richer flavor.
Milk
Whole milk provides the best texture, but almond, oat, or soy milk can be substituted if preferred.
Vanilla Extract
Even a small amount enhances the chocolate flavor and rounds out the sweetness.
Step-by-Step Instructions
1. Choose the Right Mug
Use a microwave-safe mug that holds at least 12 ounces.
This allows room for the cake to rise without overflowing.
2. Combine the Dry Ingredients
Add the following directly to the mug:
- Flour
- Cocoa powder
- Sugar
- Baking powder
- Salt
Use a fork or small whisk to mix thoroughly, breaking up any cocoa lumps.
3. Add the Wet Ingredients
Pour in:
- Milk
- Vegetable oil or melted butter
- Vanilla extract
Stir until a smooth batter forms.
Scrape the bottom and sides of the mug to ensure there are no dry pockets.
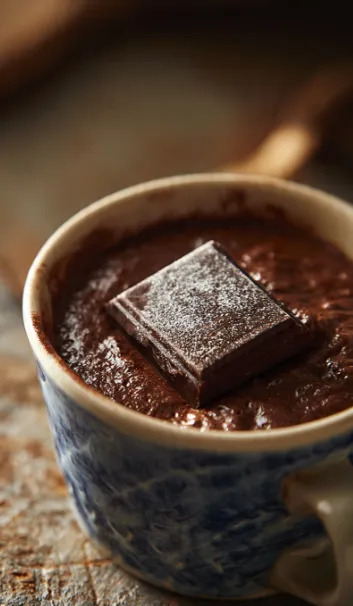
4. Add the Chocolate Center
Press the dark chocolate square or spoonful of chocolate hazelnut spread into the middle of the batter.
Cover it gently with a little batter.
This creates the signature molten center after cooking.
5. Microwave
Cook on full power for 70–90 seconds, depending on your microwave.
The cake should appear set around the edges while remaining slightly soft in the center.
Avoid overcooking.
6. Rest Briefly
Allow the mug cake to rest for one minute.
The residual heat finishes cooking the cake while preserving the molten center.
7. Garnish
Top with your favorite garnishes such as:
- Vanilla ice cream
- Powdered sugar
- Chocolate sauce
- Fresh berries
- Whipped cream
Serve immediately while warm.
Expert Tips
Don’t Overmix
Mix only until the batter is smooth to keep the cake tender.
Watch the Microwave Carefully
Cooking times vary. It’s better to slightly undercook than overcook.
Use Good Chocolate
Since the molten center is the highlight of the dessert, choose chocolate you enjoy eating on its own.
Serve Immediately
The lava center is at its best during the first few minutes after cooking.
Experiment with Fillings
Try caramel, peanut butter, cookie butter, or white chocolate for delicious variations.
Variations
Salted Caramel Lava Mug Cake
Replace the chocolate center with soft caramel candies.
Peanut Butter Chocolate Mug Cake
Hide a spoonful of peanut butter inside the batter.
Mocha Lava Cake
Add ½ teaspoon of instant espresso powder to intensify the chocolate flavor.
Mint Chocolate Version
Add a drop of peppermint extract and use mint chocolate as the filling.
Cookies and Cream Mug Cake
Fold crushed chocolate sandwich cookies into the batter before microwaving.
Storage Instructions
This dessert is best enjoyed immediately after cooking.
If necessary:
- Cover and refrigerate for up to 24 hours.
The molten center will firm up during storage.
Reheating Tips
Microwave for 10–15 seconds until just warm.
Avoid reheating for too long, as the cake may become dry.
Common Mistakes to Avoid
- Using a mug that’s too small.
- Overcooking the cake.
- Forgetting the chocolate center.
- Not mixing thoroughly.
- Using cold chocolate straight from the freezer.
- Overfilling the mug.
What to Serve With
Pair your Chocolate Lava Mug Cake with:
- Vanilla ice cream
- Salted caramel sauce
- Fresh strawberries
- Fresh raspberries
- Whipped cream
- Espresso
- Cappuccino
- Cold milk
- Chocolate curls
- Toasted almonds
Frequently Asked Questions
Can I make this recipe without eggs?
Yes. This recipe is naturally egg-free while still producing a soft, tender cake.
Why didn’t my cake have a molten center?
The cake was likely microwaved too long or the chocolate wasn’t fully covered by the batter.
Can I make it gluten-free?
Yes. Replace the all-purpose flour with a gluten-free baking blend.
Can I use chocolate chips instead of a chocolate square?
Yes. A small handful of chocolate chips creates a delicious molten filling.
Which mug works best?
A microwave-safe mug with a capacity of at least 12 ounces prevents overflow during cooking.
Can I double the recipe?
It’s better to prepare two separate mugs rather than doubling the ingredients in one mug for more even cooking.
Can I prepare the batter ahead of time?
For the best texture, mix and cook the batter immediately.
Why is my mug cake rubbery?
Overmixing or overcooking are the most common causes of a dense, rubbery texture.
Conclusion
This Chocolate Lava Mug Cake is proof that an extraordinary dessert doesn’t require complicated techniques or hours in the kitchen. With a handful of everyday ingredients, one mug, and just a few minutes of cooking time, you can enjoy a warm, rich chocolate cake with a perfectly molten center whenever the craving strikes.
Whether you’re making it for yourself after a long day, sharing a cozy dessert date at home, or introducing kids to the fun of quick baking, this recipe is simple enough for beginners while delivering bakery-quality flavor. Customize it with your favorite fillings and toppings, experiment with new variations, and make it your own.
If you give this Chocolate Lava Mug Cake a try, don’t forget to share your favorite topping combination and enjoy every warm, gooey spoonful.

[…] Chocolate Lava Mug Cake | Easy 5-Minute Dessert […]